

Revolution Slider is one amazing plugin to create beautiful sliders that can be added anywhere on a WordPress Blog. The plugin allows you to create unlimited sliders with many different and beautiful transition effects between images. Revolution Slider is not only highly flexible but very robust in built too. However, the plugin is not free and can be purchased from CodeCanyon.
Another way to obtain a copy of this wonderful plugin is by investing in a WordPress theme that already has Revolution Slider. Once you have the plugin, it can be installed like any other plugin and once installed you can find it on the right hand side of your WordPress admin page.
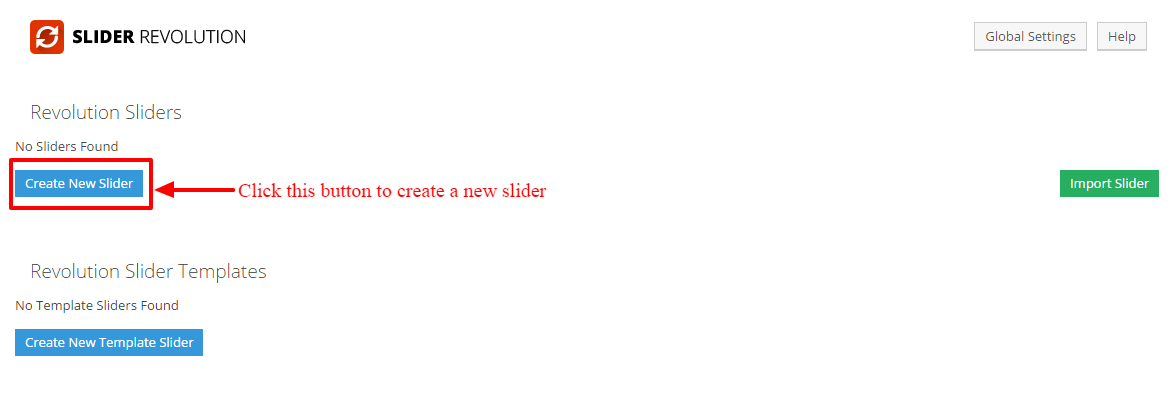
Click on the Revolution Slider menu to go to the plugin page
Once there, click on new slider to open the start creating the slider.
Once on the new slider screen, you will be shown a lot of options to configure your new slider. Let me walk you through them so you can understand and tweak them as per your requirement and wish.
Let’s get to each of the section one-by-one.
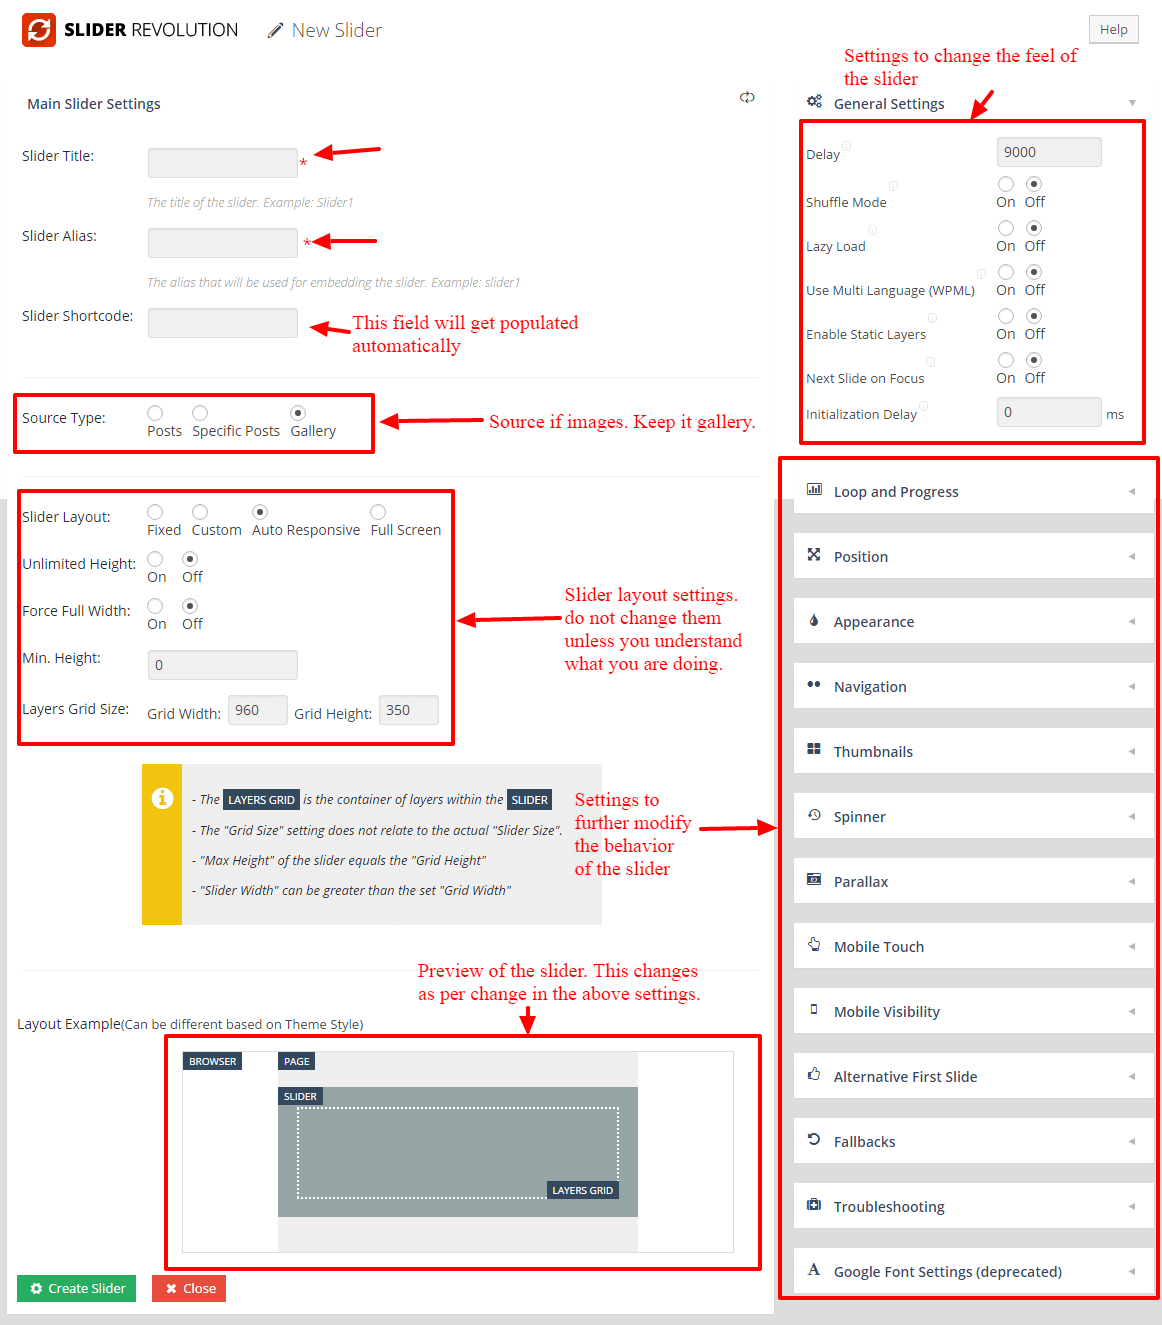
Let’s begin with the slider name. I like to keep my slider names simple and memorable and this is what I am going to use for this tutorial.
Once you have kept the name, let us select the source of the images. We will keep it as gallery. This is to ensure that plugin allows us to use whichever image we want.
Now comes the most interesting part of setting up a revolution slider – changing the look and feel of the slider. We will start with the general settings.
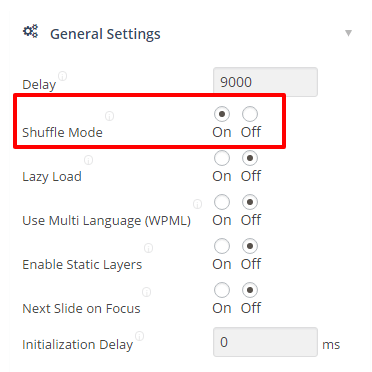
I like to shuffle my images so they do not get predictive and boring for the reader. Other than that, I do not recommend changing anything.
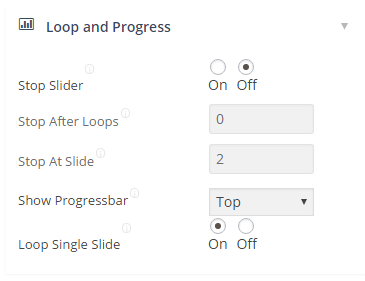
Second tab allows you to decide if you want to keep the looping on or off. I would generally not recommend changing these settings. Default is perfect for all the sliders you will ever create unless and until you do not want to loop the images.
Even the next tab, which is positioning does not need any modification. It is just perfect.
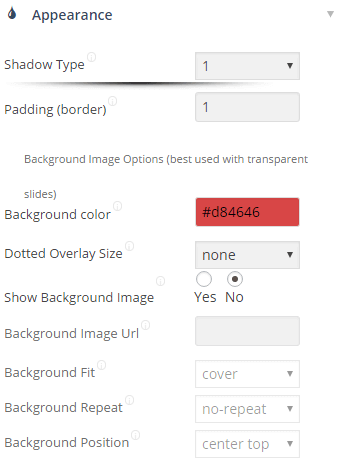
Next tab, Appearance is the fun part of creating a slider. Feel free to experiment with it. The text boxes and labels are very much self-explanatory and give you enough room to be creative and experiment.
Navigation is the next tab which allows you to setup the navigation buttons that appear on the slider. This is how I generally set navigation buttons on my blog.
Other than these there is just one more tab you should consider opening and experimenting with – Spinner. This is the pre-loader that is shown to the readers while images are loading. It has 5 cute designs and allows you to select any one.

Once you have set everything and you are happy with it, press the create slider button at the bottom left. After you created slide, you will see a message saying that the slider has been created. Once slider gets created, we will add images to the slider. Once the slider gets created, this is what you will be seeing:
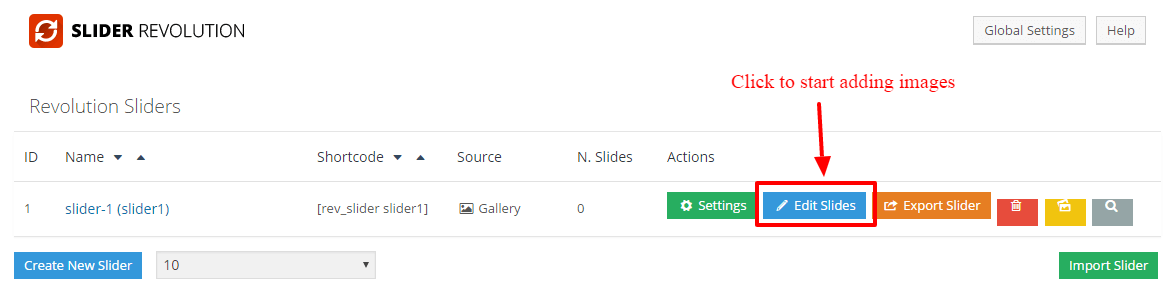
On the next screen, you will be shown an option to add slides. Click it.
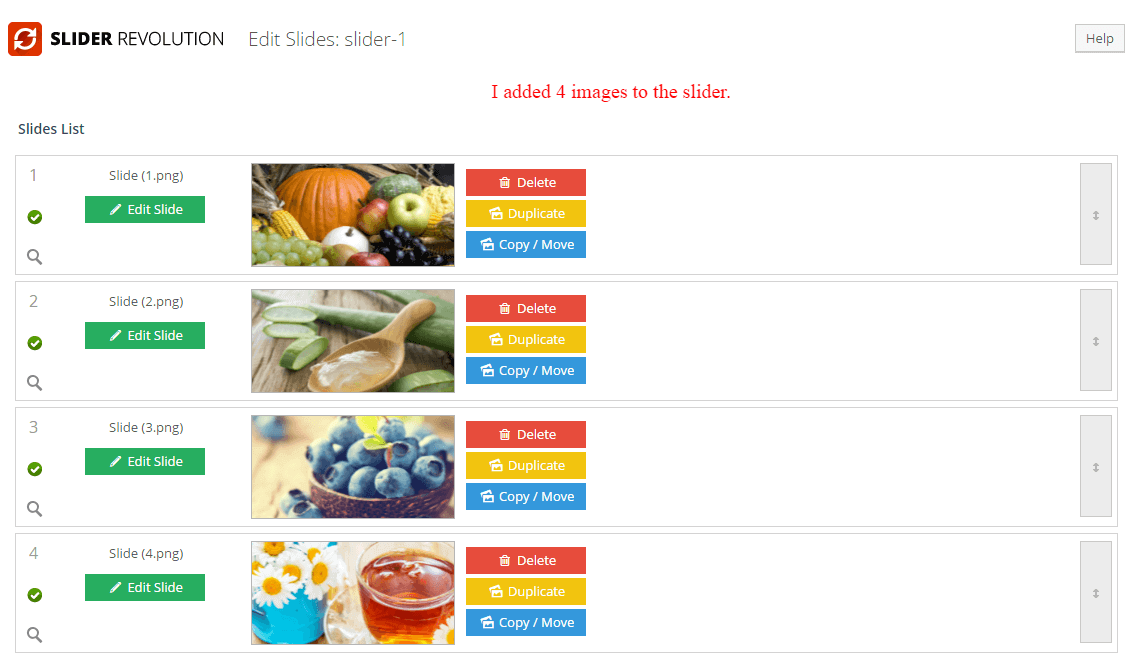
Clicking it will open the media uploader. Upload all the images that you want to add to the slider.
You can click on the green button that says Edit Slide to get all the options to beautify the slide. The next screen is filled with options that allow you to beautify the sides in an amazing manner. Lets go through all the important options one-by-one.
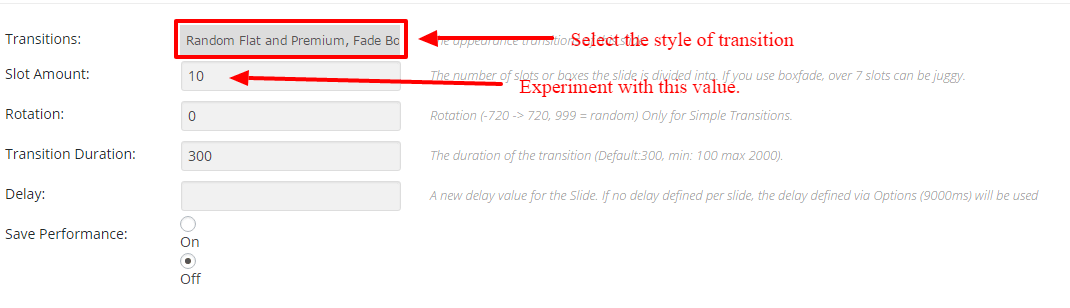
You can for example select the style of transition as well as transition duration etc..
The remaining settings are too complex to be covered in this tutorial and we will have another session to understand those. Once done with the settings, press the update slide button at the bottom left.
Till then, this is all you need to do for all the slides in your slider.
Once you have modified all the slides as per your taste, press the To Slider Settings button.
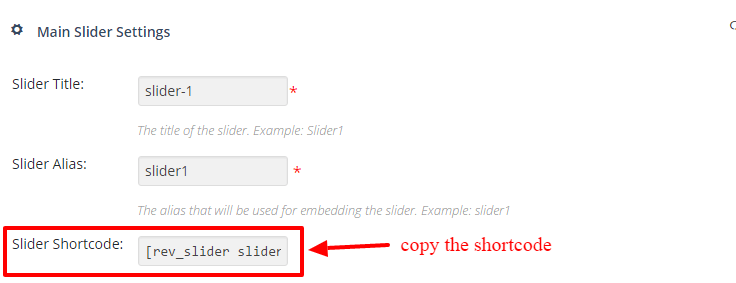
This page has the shortcode that we need to insert the slider on our WordPress blog. Copy the shortcode.
Now navigate to the page or post you want this slider to appear at. Paste the shortcode and update your page/post.
Finally, navigate to your website to view your brand new slider.
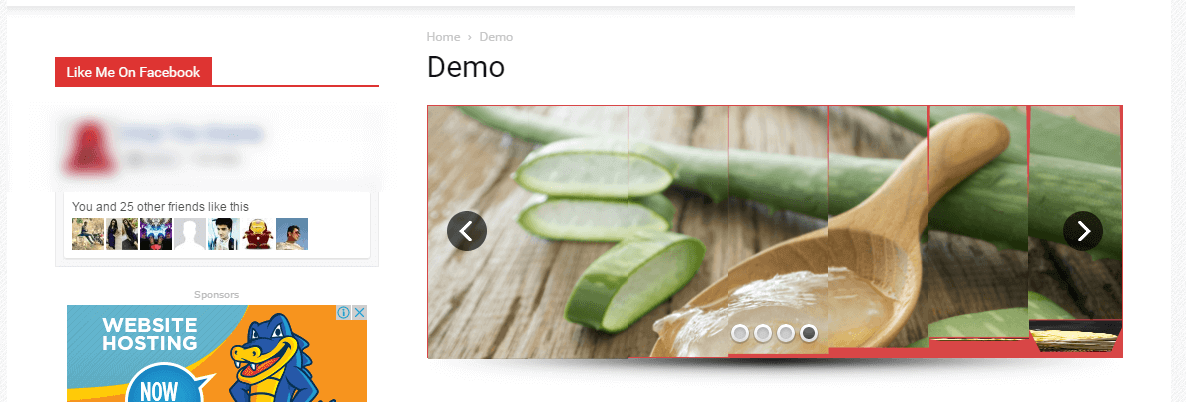
The best part about revolution slider is the flexibility and scope of customization it provides. The slides are easy to add and modify as per your taste and all this comes at a nominal cost.