A contact form is one of the most essential elements of any website. It enables your visitors to contact you directly, helps you gain further insight into your audience and makes your site look credible.
Bearing in mind the importance of said contact form, it is vital that your form is up to scratch. Contact Form 7 is a powerful free WordPress plugin that allows you to add contact forms to your website.
An extremely flexible and versatile plugin, Contact Form 7 is suitable for all. From the eCommerce giant to the humble blogger, from the WordPress coder to the complete novice, this feature-rich plugin caters for everyone’s needs.
Why Your Website Needs a Contact Form
There are many reasons why your website needs a contact form. It opens a direct channel of communication between you and your readers, allowing them to ask questions, provide feedback and even offers you inspiration for new blog posts.
If you have a product or service to sell, then a contact form is an invaluable way for your visitors to find out about what you have to offer, moving them closer towards a purchase.
Contact Form 7 enables you to create multiple contact forms and individually customize them to cater for your site’s specific needs. Straight forward to setup and use, this exceptionally popular plugin will not disappoint.
Let’s find out how to get started…
How to Install Contact Form 7 from Within Your WordPress Dashboard
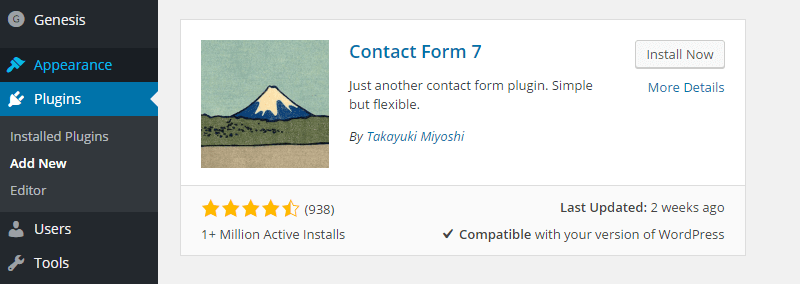
The very first step you need to take is to install Contact Form 7. Under ‘Plugins’ on your WordPress admin panel select ‘Add New’.

Type in Contact Form 7 in the search bar.

Once Contact Form 7 has appeared select ‘Install’.
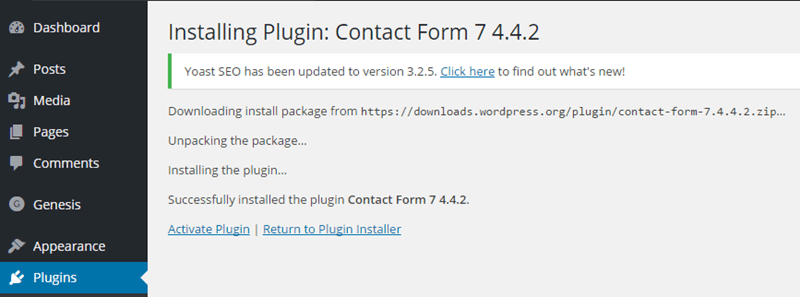
The plugin should take a few seconds to install. Then select ‘Activate Plugin’.
How to Create a Contact Page for Your WordPress Website
Once you have installed and activated the Contact Form 7 plugin you should create a Contact Page if your site doesn’t have one already. Your contact form can then be added to it.
Find ‘Contact’ on your WordPress admin panel sidebar menu and select ‘Contact Forms’.
Here you will find a default contact form, named Contact Form 1. Under the Shortcode section, there will be a snippet of code you need to copy.

Next, under ‘Pages’ on your WordPress admin panel select ‘Add New’.

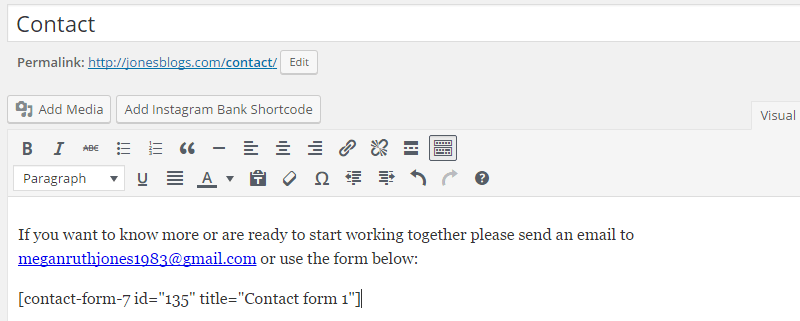
Now create a new page called Contact. Inside the textbox I usually write some words to this effect:
If you want to know more or are ready to start working together please send an email to megan@jonesblogs.com or use the form below:
Under this text paste the previously copied shortcode.
‘Preview Changes’ and if you are happy with what you see so far select ‘Publish’ or ‘Update to make the new page available to your visitors. Your basic form has now been published and is working.
How to Display a Contact Form on Any Page of Your Website
It can be very advantageous to display a contact form on other pages of your website, as well as your Contact Page. For example, I display a contact form at the bottom of my About Page.
Adding a contact form to other pages of your website is extremely easy to set up. Simply go to the page in your WordPress dashboard that you want to add the form to.
For example under ‘Pages’ choose ‘All Pages’ and then from the list of pages presented select your ‘About Me’ page.

Underneath the text you have written, paste the shortcode you copied and used previously.
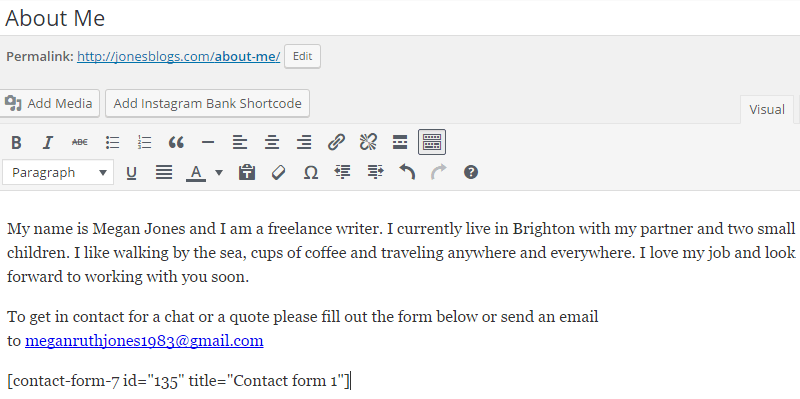
Once you select ‘Update’ your contact form should now be displayed at the bottom of your About Page. If you would like to display the form further up the page simply insert the code in between the text where you would like it.
How to Add More Fields to Your Contact Form
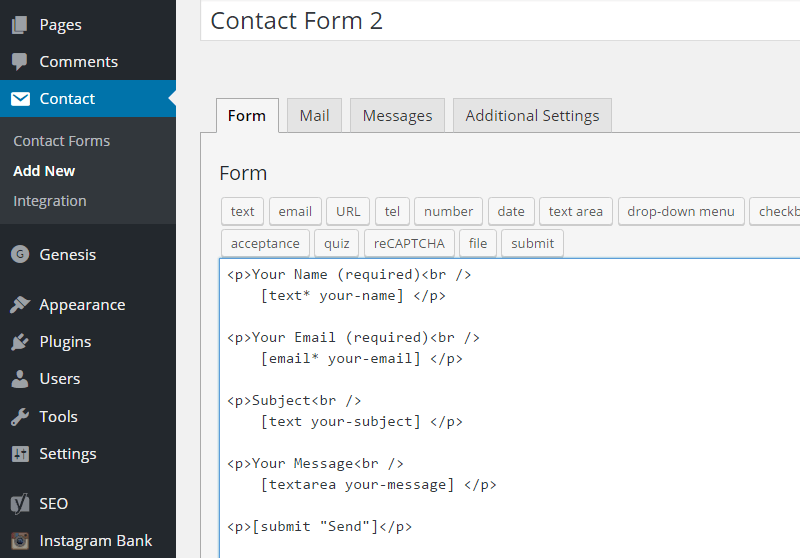
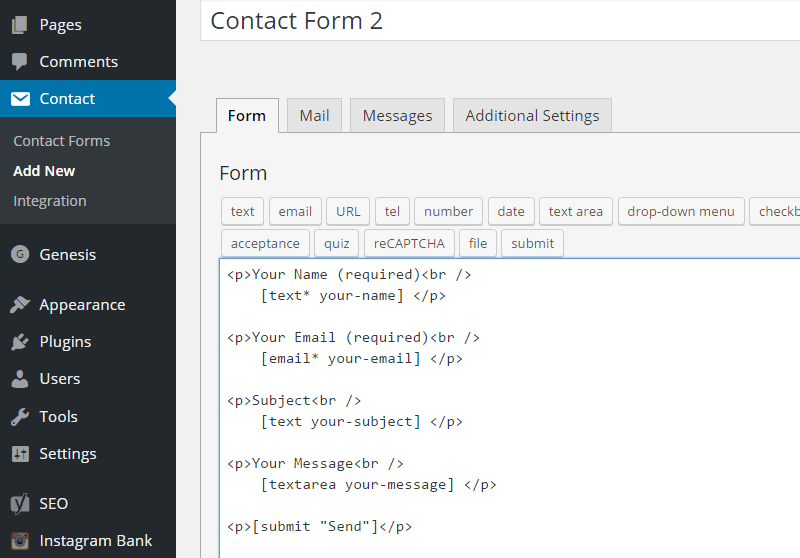
The default form for Contact Form 7 displays fields for name, email, subject, and message, as well as a send button. If the form is a little too basic for you then you can add more fields.
To do so, firstly, find ‘Contact’ on your WordPress admin panel and select ‘Contact Forms’. Select ‘Edit’ under Contact Form 1.

Here you have the Admin Screen for your form displaying the options of Forms, Mail, Messages and Additional Settings. It is these four options that allow you to customize this form to suit your needs.
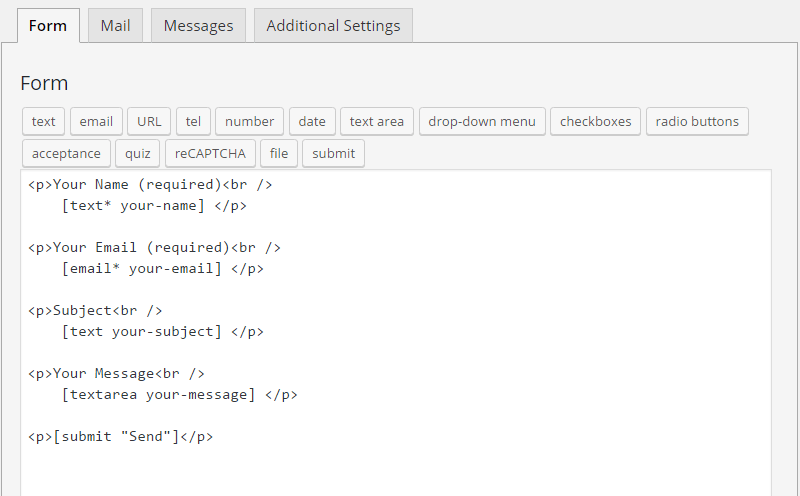
To add extra fields to your contact form you want to stay on ‘Forms’. At first, glance, if you are not familiar with using codes, the Form section may look a little daunting. It’s not! To alter the Form the plugin uses HTML and form-tags. However, there are tag-generators to create the tags for you so you need a little knowledge of them.
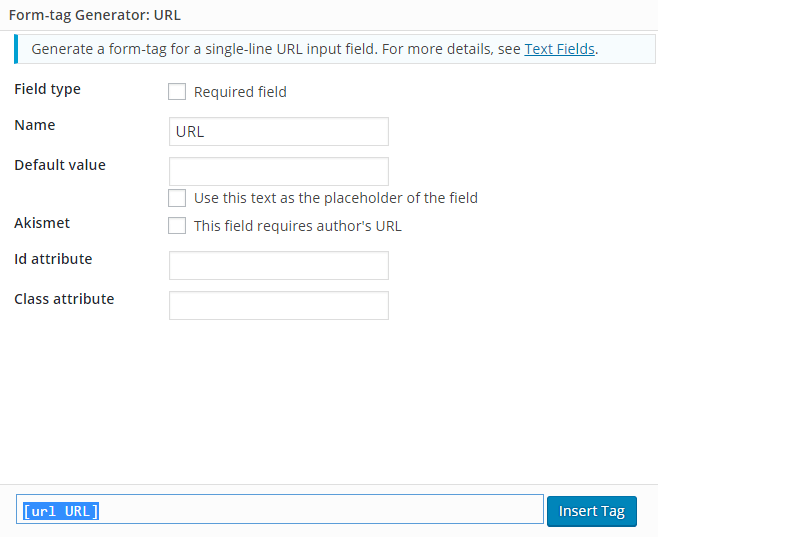
Under the Form tab move the cursor to the position where you would like to add the new field. Click on the appropriate button, for example ‘URL’, to generate a tag.

From the Form Tag Generator screen that is displayed, decide if you want the field to be required or not, enter a name, such as URL, and then hit the ‘Insert Tag’ button.
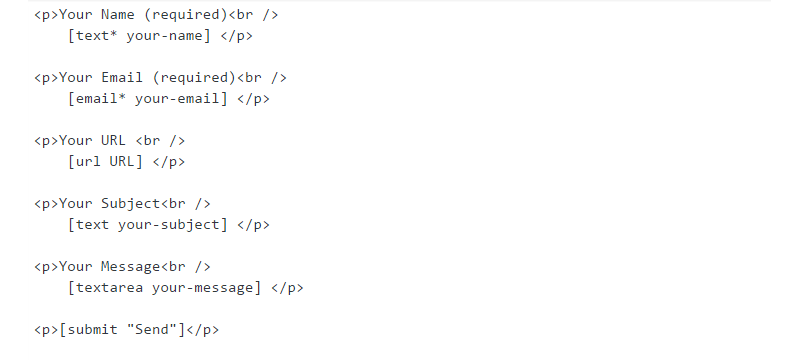
Copy the formatting of the other fields and add some text to describe the field to your visitors. For example ‘Your URL’.
You then need to switch to the ‘Mail’ tab.

Scroll down to the Message Body section. Add the same generated tag in this box so when you receive an email from your website it will display the sender’s URL, along with their other information.

Lastly, save the form. Changes will be applied to all published instances of the form with no action required on your part.
How To Create Additional Forms
Many websites need to display a variety of forms. As well as your standard contact form you might need a form to let your visitors request a quote, add dates to check availability, put in orders or make reservations, to name but a few. Each of these forms would need to be created separately as they would all need to include different fields.
To create an additional form you need to find ‘Contact’ on your WordPress admin panel and select ‘Add New’.

Give it a new name, change the fields to suit your needs and then copy and paste the shortcode onto the page where you want it displayed. Nice and simple!
Final Thoughts
Now you know how to create a contact form and add any extra fields you may need. If you have any more bespoke needs Contact Form 7 offers detailed instructions on using this plugin. There is also a useful FAQ section and support forum if you have are struggling to get started or have any questions.
Once you have setup your contact form, test it to check it is working. Forms should automatically be sent by email to the address you provided in ‘Your Profile’, found under ‘Users’ on the WordPress admin panel. If you don’t receive an email once you have submitted a contact form check your Spam folder first before you start troubleshooting.
Do you use Contact Form 7 for your contact forms? Please share your thoughts and comments on it below…

