

Trying out new themes, and testing new plugins and codes for your website is a customary thing for any website owner to do. However, most of the owners take the risk of testing new codes and plugins on a live website. Editing your live site can cause much trouble to you and your users.
To avoid the risk of crashing or damaging your site, we will learn how to create a staging site for your WordPress website. By creating a staging site, you can test new themes, plugins and codes on it without affecting your actual live website. Let’s begin by understanding what a staging site is.
What is a staging site?
A staging site is a replica of your original site, however, the changes that you make to it will not affect your original live website.
Your staging site will not be available to the public.This helps you in testing new themes, codes and plugins without actually risking your live website.
How to create a staging site?
We will look at three basic methods of creating a staging site.
- Using your web host
- Using the WP Staging plugin
- Creating manually
Depending upon how deep you want to go in testing changes, you can consider employing different methods. If you only want to test for new plugins and themes, then using a plugin is good enough. However, if you wish to experiment with codes, then you must create it manually.
Create a staging site using your web host
It is very common to find a built-in feature to create staging sites as a part of your web hosting service. Many wonderful web hosts provide staging sites as a built-in feature.
The following web hosts provide this feature:
Usually, with a few clicks you can setup a staging site and also merge it back with the live site as easily. However, not all web hosts offer this feature as part of their plan. You might have to buy it separately. Thus, if you have a sizable operation and the changes might affect the functionality of your website, creating a staging site becomes relevant and crucial.
Use a plugin to create a staging site

Using a plugin to create a staging site is one of the easiest ways of getting the task done. WP Staging is an excellent plugin to do the job. It is a clean and quick way to test out for simple tweaks and changes. You can test for a new plugin or a theme, check their functionality and their compatibility with your WordPress.
Many other plugins do not work well with WordPress and interfere with the rest of WordPress. However, WP Staging sits perfectly well with the CMS.
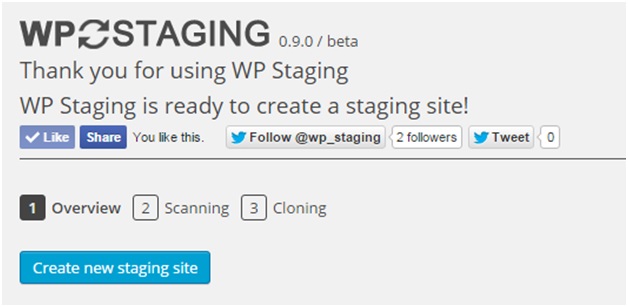
Step 1: Install and Activate
Simply install the plugin and set it up from your dashboard. On your WordPress dashboard on the left hand panel, you’ll see a WP Staging Tab. Click on create a new staging site.
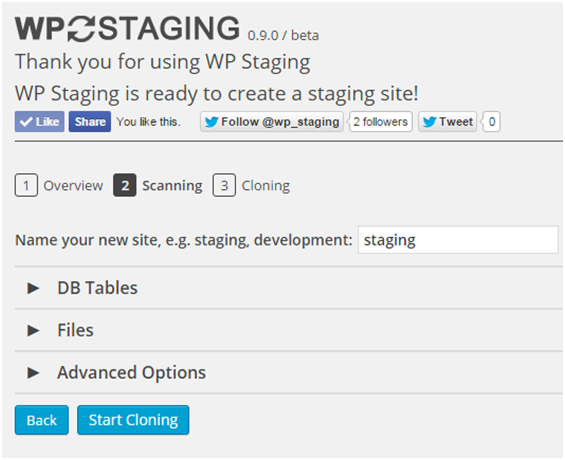
Step 2: Give a Name
Give a name to your staging site, e.g. Clone site, staging, etc. and hit ‘Start Cloning’.
Step 3: Begin Cloning
The cloning process will take some time as the plugin copies database tables, files and replace links. Once the process is complete, an option to open a staging site prompts using your admin credentials, which are your usual wp-admin username and password.
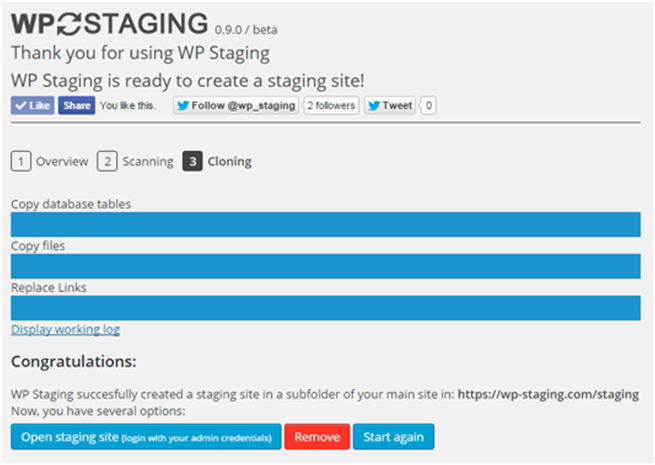
You can straight away begin testing new plugins and themes once you log in.
You can tell that you are on the staging site by an orange admin bar that stays on top of the screen. It is as easy and quick to clone your site using a plugin. However, you do not have much freedom to conduct code-heavy experiments. For that you must use the manual method.
Create a staging site manually
To have more freedom for deeper and more robust testing, it is best that you create a staging site manually on a subdomain rather than a localhost. The advantage of using a subdomain over a localhost is that it gives you an identical hardware environment as the original site.
We will have a detailed look at how you can manually create a staging site. The process is simple, but needs your keen attention.
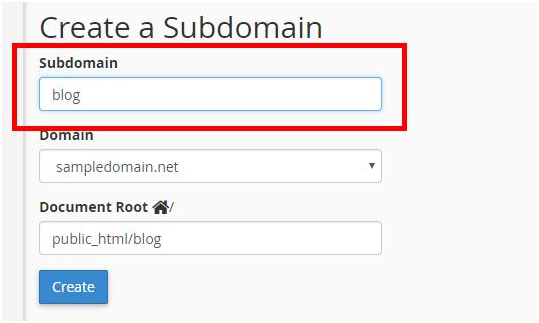
Step 1: Use cPanel to create a subdomain
A subdomain is required to house your staging. You can find the subdomains in your cPanel, and click on it.

Give a name to your subdomain, e.g. Clone or Staging, and hit create.
Step 2: Create an FTP for your subdomain
An FTP account for your subdomain always ensures that everything is kept separate. Once you open the FTP Accounts option, you can enter the account details. Please ensure that the directory matches the directory (Document Root) for your subdomain.

Step 3: Upload WordPress files to staging site
Download the latest version of WordPress and use your new FTP account to upload the files to your staging site.
Now, in your original WordPress website, you will find the following folders:
- …/wp-content/uploads
- …/wp-content/themes
- …/wp-content/plugins
Upload these folders to the staging site as well. You can use cPanel’s File Manager to upload these folders in case they are heavy. FTP might take its time to run through these folders.
Step 4: Export database to staging site
You need to export the database from the original website to the staging site. You can use a plugin to do it easily. WP Migrate DB is a decent plugin to use. Install the plugin then go to tools -> Migrate DB.
The plugin will automatically update all file paths towards your new staging site URL. Ensure that you enter the same directory path and URL that you used when you created your subdomain.
Click on Export.
Now to import the data to your new staging site, go back to your cPanel and click on the MySQL Databases option. Click on the Create Database option.
Create a new database user and give the new user access to the new database.
Now, go to PHPMyAdmin. Find the database you created and click on the import tab. Upload the file, Migrate DB exported.

Finally, click on GO to import data to your staging site.
Step 5: Edit wp-config.php
To use your new database details and username, you will have to edit your wp-config.php file for staging site.
Make sure that database prefix matches with that of your live site.
Step 6: Restrict Access
If everything went well, then you must be able to login to your new staging site using your username/password.
Finally, when all is done, you want to restrict access to your staging site so that search engines do not index your site.
You can do that by going to Settings -> Reading and then checking the box ‘enable site-wide password protection’.
Conclusion
By creating a staging site, you will avoid damage on your live site and a bad user experience. Once you are satisfied with the changes on your staging site, you are ready to push them to your live website. If using a web host’s service, you can do that by a single click. To do so manually, it might take some time and patience. But it is always best to merge sites manually rather than using an automated process.