
Introduction
An authorization system is necessary for the vast majority of apps. Validating a username and password against Users-table is sometimes sufficient, but typically a more granular permissions model is required to provide some users access to resources while denying it to others. It’s not easy and often takes a lot of effort to set up a system to handle the latter.
To get up and running quickly using Firebase is important and convenient to construct a role-based authentication API. Access is provided to roles rather than particular users in this authorization model, and a user may have one or more roles dependent on the basis of how your permission model is designed. However, resources have stricter authorization requirements.
You should hire Angular developers to ensure a successful outcome with this project.
Creating a Project
Following are the steps through AngularJs frameworks project for web development:
- Your computer must have Angular.js installed before you can begin using our application. If you have Angular.js already installed, you can find out what version it is by using the command given here: Angular – version.
- Assuming you have Angular.js and the Firebase CLI set up, you can now access the Firebase terminal in your web browser. You’ll need to use your Google account credentials to proceed. Once you log in, a button to “Create a project” will become available.
- You should be able to utilize this guide even if the user interface has changed after it was written. If you want to start a new Firebase project, all you have to do is click the Create a project button.
- Choose a name and ID for your project now. To keep track of my thoughts, I plan on using the journal-rest-api. In order to avoid confusion, you’ll need to select a new project ID. Once you’ve finished those steps, you’ll be able to set up your Firebase project.
Adding Material and CDK
(Angular’s) Material’s geometric aesthetic might be a blueprint for an integrated framework of visual, motion, and interaction design that works well across a wide range of screens. Building quicker, more attractive and responsive websites is part of this.
- You must first check that the Angular CLI has been successfully installed.
- The second step is to build a workspace for the Angular Project.
- Third, set up Angular’s core components, including Angular Material, Angular CDK, and Angular Animations.
- A setup animation is the fourth stage.
- The fifth stage is to import the Angular Material module components.
- The sixth stage is the “Gesture Support.” The appliance has to have AngularJS installed in order to make use of all of those features.
Visualizing Tasks
- The next stage is to design a piece that can be used to represent the kanban board’s responsibilities graphically. To use it, navigate to the src/app directory and type the following command into the command prompt: ng generate component task.
- With this command, the TaskComponent will be created and a declaration for it will be added to the AppModule. Generate a file with the name task.ts inside the task folder. This file will be used to specify how the kanban board’s tasks interact with one another. Optional fields for each job will include an id, title, and description; they will all be of string type: src/app/task/task.ts
- Modify the sample TaskComponent! To do this, open task.component.html and insert the code below: src/app/task/task.component.html
- Next, we’ll make some tasks in the AppComponent and display them in the TaskComponent. Create an array named todo in AppComponent, and then add the following two items to it: src/app/app.component.ts
Implementing Drag & Drop Functionality for Tasks
Now comes the exciting part! Making use of the Angular CDK, we can design a drag-and-drop interface with three swimlanes representing the three possible task states.
- The app-task component, which was sitting above the *ng. For directive in app.component.html, should be deleted and src/app/app.component.html should be inserted instead.
- All sorts of things are occurring. Let’s break down this fragment into its constituent pieces. The template’s top-level organization looks like this: src/app/app.component.html
- Here, we’ll make a div with the class name “container-wrapper” to enclose all three swimlanes. The h2 tag contains a title and the class name “container” for each swimlane. Now let’s have a peek at the first lane’s architecture: src/app/app.component.html
- For this to function properly, we need to add an import to the DragDropModule to the app.module.ts file in the app’s source folder: src/app/app.module.ts
Creating New Tasks
- To build a feature for adding new jobs right now. Let’s do this by revising the AppComponent source file: src/app/app.component.html.
- We then surround the container-wrapper in a top-level div and add a button with a “add” material icon and the text “Add Task” to it. This additional wrapper is required so that the button may be positioned above the swimlane list, which will be aligned next to one another using flexbox. The AppModule’s src/app/app.module.ts file has to be updated with an import of the material button component, which this button utilizes.
- Let’s go to work on the AppComponent’s feature to create new tasks. A synthetic exchange will be used. We’ll have a simple form with just a title and some text to describe it in the dialogue box. The form will open when the user hits the “Add Task” button, and the task will be added to the list after the user submits the form. Have a look at the high-level AppComponent implementation of this feature: src/app/app.component.ts
Improving App’s Style
We’ll alter the application’s layout by adjusting the styles a little to make it more aesthetically pleasing to the eye. Put the lanes of the pool adjacent to one other. The “Add Task” button and the label for the currently empty list also need a little tweaking from us. The styles should be added at the bottom of src/app/app.component.css.
When we drag an element and drop it somewhere else, the Angular CDK duplicates it and places the copy elsewhere. When the CDK adds the cdk-drag-placeholder class to the placeholder, we use the opacity attribute to make sure it is not displayed. The CDK also applies the cdk-drag-animating class when we release an element.
Editing and Deleting Existing Tasks
The vast majority of features we’ve previously created will be put to use when we modify and delete old jobs. Each time a user double-clicks an item in the task list, the TaskDialogComponent will be opened and the form’s title and description will be automatically filled in.
The TaskDialogComponent will also be updated to include a delete option. It will send a delete command to the AppComponent when the user hits it. There is only one tweak that has to be made to TaskDialogComponent’s template: src/app/task-dialog/task-dialog.component.html
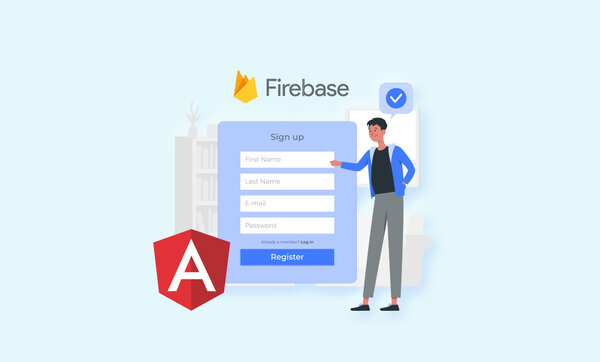
Creating New Firebase Project
In order to get started, you will need to create a completely new project in Firebase. Proceed to the Firebase Console when you are ready. After that, you may decide what sort of project you want to make and then give it a name that is convenient for you to use and respect according to your preferences. In the long term, this will make things easier for you to manage and will assist you in operating this platform more effectively.
Adding Firebase to the Project
Here, we’ll set up our app to use Firebase. The @angular/fire package, provided by the Firebase team, allows for seamless connection between the two frameworks. You can integrate Firebase into your project by opening the root directory of your workspace and running: ng add @angular/fire.
If you want to install the @angular/fire package, executing this script will first ask you many questions before installing it. While that is taking place, a new tab in your browser will be launched for you to use to sign in to your Firebase account. At long last, just before it begins to generate files locally, it will ask you to choose a Firebase project to work with. Next, let’s get started on constructing a database in Firestore.
To create a database in the cloud, select the appropriate option from the drop-down menu, and then click the “Create Database” button. The next thing that has to be done is the construction of a test database. To conclude, pick a region from somewhere in the world (according to your location).
Simply adding the Firebase settings will bring your environment one step closer to completion. In the Firebase Console, you’ll discover all of the settings that pertain to your project. Choose Gear from the drop-down menu after selecting Project Overview. Modify the parameters so that they are appropriate for the current project. Make your selection from the list of “Web apps” located under “Your applications.” When you are registering your app, the following step is to make sure that “Firebase Hosting” is set to “on.” After pressing the “Register app” button, go to the location src/environments/environment.ts in order to save your settings.
About the author: