

In this tutorial, we are going to learn how to write and post to a WordPress.com blog by just sending an email. This feature is known as “Post by Email”. WordPress.com currently provides this feature out of the box. Moreover, you can use any device & any email client to send the email and publish the articles on the fly. In this post, we are going to discuss about why is it useful, steps needed to setup and various formatting options available.
“Post by Email” feature is useful in a lot of scenarios. Bloggers can regularly use this feature to avoid the hassle of logging into WordPress.com dashboard each time they wish to publish a new post. It is also useful at places such as colleges and companies where limited or restricted access to internet is available.
Please note that this feature works with WordPress.com blogs only. For self-hosted blogs, there are certain plugins to publish post using email. We will cover that some other day.
Now let’s dive into the steps to be followed to generate an email ID, which we can then use to publish posts on our WordPress.com website.
Step 1: Login to the WP admin dashboard of your website.
As we all know, the quickest way get to WP admin dashboard is to add “/wp-admin” to the end of your blog’s URL. For example if you are having a website www.example.com, you can access the WP admin dashboard by the URL “www.example.com/wp-admin”. Simply provide login credentials to sign into your account.
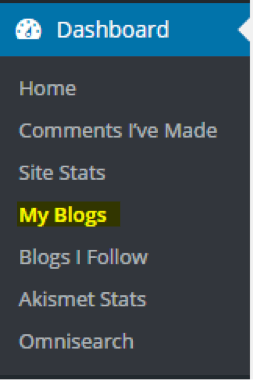
Step 2: In the menu on the left, locate and click on “My Blogs” tab
Step 3: Now you’ll see a list of blogs. Now we need to generate a unique email ID for a blog. For that locate the blog for which unique email ID is to be generated. For example, suppose you need to setup an Email ID for “demodomainblog.wordpress.com”. So you’ll locate that blog and click on”Enable” button under “Post by Email” column as shown in the screenshot below.

On clicking the button, an Email ID gets generated.

Now you can send email to this Email Address to post directly to your website. An important thing to note is that this generated Email Address is per user per blog. So if there are multiple users posting to same blog, each user will need to generate their own unique email address. Also, when you send an email to this generated Email Address, WordPress.com assumes that you are the author of the content and thus adds your name in author field, by default. Also, anyone with a user role of “contributor” will not be able to directly publish to the website. When such a user sends the email, his/her post will be saved as “Pending” and will be published only after getting approved.
Word of caution: Never disclose this unique email ID to anyone. Anyone who knows this email ID can directly post to your website.
Now that we have done the setup steps and got our unique email ID generated, we can start posting on website from email. An Email has 2 parts i.e. Subject and Body. Email’s subject is directly used by WordPress.com as title of the post whereas the body of the email is used as the content of the post.
Now let’s look at the formatting options available to us. Remember to use a modern mail clients such as Gmail, Hotmail, and Outlook which support rich text formatting. You can even attach images in the email which you want to be included in the post.
There are a lot of special shortcodes that you can embed in your email to configure different aspects of the post
- [category x, y, z]: You can specify categories for your post in comma separated format. It is not necessary to mention the complete category name. Start of the category title is automatically matched with the existing categories. This in turn means that you cannot add a new category from email.
- [tags a, b, c] : Similarly tags can also be added when specified in comma separated format. However, unlike category, it is not necessary to use existing tags. New tags are created if the tag doesn’t already exist.
- [delay +5 hours] : You can specify the delay in publishing the post. For example “+5 hours” will publish the post after 5 hours of receiving the mail. You can also schedule the post at exact time by directly specifying the time. For example [delay 2016-05-30 1:00:00 IST].
- [comments on | off] : Using this shortcode, you can enable or disable comments on your post.
- [status publish | pending | draft | private] : If you do not want to publish the post directly, you can use status shortcode to keep the post in other status such as pending, draft or private. By default, if no status shortcode is provided, the article is published directly.
- [end] : Anything written after this tag is ignored by the WP
- [slideshow] : This shortcode replaces the auto gallery with a slideshow
- [nogallery] : This shortcode disabled auto-gallery and thus displays all images inline.
- [more] : You can add “more” tag to display the content above this tag by default and give user an option to click on more button in the post to view the remaining content as well.
- [nextpage] : This shortcode can be used to implement pagination in long posts. A long post would be split into multiple web pages. Links to various parts of the post appear at the bottom such as below
- [publicize off|twitter|facebook] : This shortcode allows you edit the publicize settings for your post. [publicize off] disables all publicize notifications. [publicize twitter] only sends a notification to twitter.
Overall, “Post by Email” is a handy feature to make the process of posting to a WordPress.com hosted website as simple as sending an email to a friend. With all the shortcodes and formatting options available, there are very little aspects of WP posts which you can’t control by using email instead of directly WP dashboard. So what are you waiting for, it’s time to quickly get your hands dirty with this amazing feature and start using it regularly.